Tuesday 16 December 2014

Evidence:Editing

We are now beginning to edit our Preliminary Task. We are going to be adding non diegetic music and we are also planning to use the black and white colour scheme throughout. Also, we want the shots to be quite short and to have a quick pace to build tension and to make the audience anxious when watching. The group is working really well together and we are getting everything done quite quickly and at a high standard. We have already begun to talk about out main task after Christmas and have some great ideas!

Locations!


This door is used in many shots such as the close up of the handle and the match on action shot.
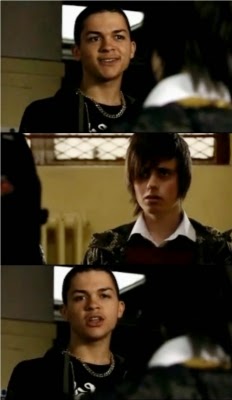
The long shot of the corridor and part of the door is used to show the main character walking towards the room where her boss is to create tension.
We chose to use this corridor on the second floor because it was wide and very long so we could film many long shots for the opening of the scene.

Monday 15 December 2014

Risk Assessment

It's important to consider the risks when filming, we filmed in a classroom which consisted of chairs, tables, our filming equipment and computers.


The chair legs create a risk of someone tripping over them and injuring themselves, and possibly damaging the filming equipment. The tables have the same risk.


We made sure that the tri-pod was out the way when we weren't using it, in order to prevent people from tripping over the legs that flare out.


If we were to have drinks around the computers, there's a risk that the drink could get spilt over one of the computers, and possibly start a fire.


In our sequence, we required a knife, and to prevent any risks, we used a fake knife; using a real one could be dangerous as we could cut ourselves.


Filming!

During Fridays' lesson we successfully filmed all the shots and more for the task. Firstly, we looked at different locations that we could film in. There were not many classrooms free so we had to resort to filming on the second floor. We chose a classroom that had a desk for Zoe's character and a corridor where we could film a long shot of my character holding the knife. Jess (the camera operator) filmed a few shots including long shots, medium shots, close ups and match on action. Then we filmed in the classroom where Jess had to make sure that she kept to the 180 degree rule. Jess filmed a variety of shots during the dialogue including shot/reverse shot.
We successfully filmed everything during that one lesson. The next step is to edit our shots together to ensure that we create tension throughout the scene. Also, during editing I believe that we should include some instrumental music to build up to the dialogue. When using non - diegetic sound it helps to ensure the audience know each characters personality.


Tuesday 9 December 2014

Script!

Sofia slowly walks into the room and anxiously approaches the desk where Zoe is sitting. Zoe doesn't look up, she continues  working at her desk. Sofia then gently places a knife onto the desk and slides it towards Zoe, she looks up at Sofia with pride.

Zoe: Is it done?


Sofia takes a deep breath.

Sofia: Yes.


Both characters pause.

Sofia: He's dead


Fade to black.


Storyboard Completed.


Shot 1 - Medium Long shot of Sofia walking down the corridor and approaching the door.
Shot 2 - Close up of the door handle and the door opening.
Shot 3 - Medium shot of Sofia entering the room.
Shot 4 - Medium shot of Zoe sitting at a desk, working and looking away from Sofia.
Shot 5 - Close up and Tracking shot of Sofia's feet walking towards the desk.
Shot 6 - Medium shot of Sofia approaching the desk.
Shot 7 - Medium Close up of Sofia placing a knife on the desk and sliding it towards Zoe.
Shot 8 - Medium Close up of Zoe looking at Sofia. "Is it done?"
Shot 9 -  Medium Close up of Sofia looking back at Zoe. "Yes"
Shot 10 - Close up of Sofia still talking to Zoe. "He's dead."

Post 5 - Allocating Tasks To Group Members

Camera Operator/ Director of filming    - Jess
Jess is the camera operator because she has a lot of experience including filming in her GCSE Media project where she achieved a high grade. Due to the group only have three members, Jess will be the only film operator because Zoe and I will be acting in the scene. I am also going to be helping Jess creating the storyboard because I have a few ideas.


Storyboard Artists - Jess/ Sofia
The storyboard is being created by Jess because she has a very creative mind and feels confident in completing this task to the best of her ability.


Location Scout's - Zoe
Zoe has some great ideas for the location of the scene. She is also very organised and aware of risks of each surrounding area.


Prop Manager - Zoe
Zoe has a variety of props at home that we can use in the scene to make it more realistic. However, we all have props at home so we can have a choice of what to use.


Casting Director - Sofia
I have chosen to be Casting Director because I believe that I am organised and I am a good team  leader. I will be making sure that everyone is doing their job and we are working to a clear schedule to make sure we get everything done.


Storyboarding


Writing the script: Evidence of planning


Match on Action


Match on action means that when something happens in the scene then when there is a cut the same piece of action must continue. this is an example of continuity editing and helps the audience to understand exactly what is happening in the scene. the action must be kept continuous to avoid disruption. A medium shot of the action and then a close up is the most effective use of match on action, a medium shot of a person opening a door and then a close up of the door handle or the hand on the door is an example of this.


Monday 8 December 2014

Shot/Reverse Shot


Example
Example of Shot/Reverse Shot
Shot/Reverse shot is used when two characters are talking, it is used to show facial expressions and reactions to what one character has said to the other. An over the shoulder shot is used to create a personal connection with the character. Since the characters are shown facing in opposite directions, the viewer  assumes that they are looking at each other. Shot reverse shot is exceptionally important in scenes of dialogue. It uses the 180 degree rule and eye line match.  The shots you should have for a basic shot/reverse shot are: a two shot of the two characters usually in wide or medium shot, an over the shoulder shot on character A, and an over the shoulder shot on character B.


Example of Shot/Revers Shot                   

The 180 Degree Rule

When you film a scene using separate shots, it’s important that people understand where everything in the scene is. The 180 degree line (or line of vision) allows you to only film from one side of the action, this is so the characters stay in the same position on the screen when they are having a conversation. The diagram on the right shows three cameras on the one side of the 180 degree line, this means the cameras will be able to film the conversation but keep the characters in the right position on screen. If one of the cameras were to cross the line of vision, the sequence would not work.


 This is what the two shots would look like if you were to cross the 180 degree line, the two characters would be in the same on-screen position which would confuse the audience as it looks as if the two characters are the same person.

The Preliminary Task


The Preliminary Task.
The specification states that this must be:
‘ A continuity task involving filming and editing a character opening a door, crossing a room and sitting down in a chair opposite another character with whom she/he then exchanges a couple of lines of dialogue.’ The sequence must last no longer than one minute.

This task should demonstrate:

  • Match on Action
  • Shot/Reverse Shot
  • The 180 degree Rule

You will also have to incorporate Music, lighting, dialogue (recorded separately on a lapel mic and voice recorder)  and sound effects into your film

All filming and editing must take place on campus, using College equipment.
Each group will set up a blog onto which you will record  the entire process